To get YouTube video tags using HTML, CSS, and JavaScript, you will need to use the YouTube Data API. This API allows you to retrieve various types of information about YouTube videos, including their tags.
To use the YouTube Data API, you will first need to obtain an API key. This can be done by creating a project in the Google Cloud Console and enabling the YouTube Data API.
Once you have an API key, you can use it to make requests to the YouTube Data API to retrieve information about videos. To get the tags for a specific video, you will need to make a GET request to the “videos” endpoint, passing in the video’s ID as a parameter. In your HTML, you can then use JavaScript to make this request and parse the response to extract the video’s tags. You can use CSS to style the tags and display them on your webpage in any way you desire.
Video Tutorial of How to get YouTube video tags using HTML, CSS & JavaScript
As you have seen on the given demo tutorial of How to get YouTube video tags using HTML, CSS & JavaScript, If you are feeling bored watching the given video tutorial of How to get YouTube video tags using HTML, CSS & JavaScript then you can copy or download the given codes below:
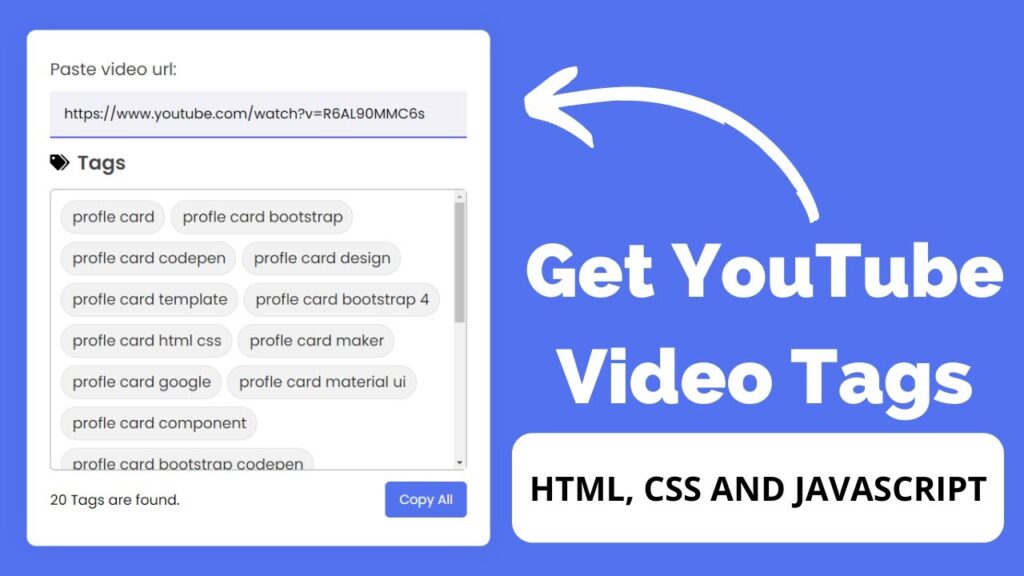
How to get YouTube video tags using HTML, CSS & JavaScript | Free Source Code
To create this program (Tag Finder). First, you need to create three Files one HTML File and another one is CSS File and the last one is JavaScript File. After creating these files just paste the following codes in your file.
In the first place, make a HTML document with the name of index.html and paste the given codes in your HTML record. Keep in mind, you’ve to make a document with .html extension.
<!DOCTYPE html>
<!-- Coding By S-hTech04 - youtube.com/STech04 -->
<html lang="en" dir="ltr">
<head>
  <meta charset="utf-8">
  <meta name="viewport" content="width=device-width, initial-scale=1.0">
  <title>YouTube Video Tags | S-Tech04</title>
  <link rel="stylesheet" href="style.css">
</head>
<body>
  <div class="wrapper">
    <textarea hidden class="hidden"></textarea>
    <div class="content">
      <div class="url-field">
        <span class="title">Paste video url:</span>
        <div class="field">
          <input type="text" id="url-input" required placeholder="https://www.youtube.com/watch?v=lqwddfd3432fs">
          <span class="bottom-line"></span>
        </div>
        <div class="title">
          <img src="./tag.svg" alt="">
          <h2>Tags</h2>
        </div>
        <ul>

        </ul>
      </div>
      <div class="details">
        <p><span>0</span> Tags are found.</p>
        <button>Copy All</button>
      </div>
    </div>
  </div>

  <script src="./script.js"></script>
</body>
</html>
Second, make a CSS record with the name of style.css and paste the given codes in your CSS document. Keep in mind, you’ve to make a record with .css extension.
/* Import Google Font - Poppins */
@import url('https://fonts.googleapis.com/css2?family=Poppins:wght@400;500;600;700&display=swap');
*{
  margin: 0;
  padding: 0;
  box-sizing: border-box;
  font-family: 'Poppins', sans-serif;
}
body
{
    display: flex;
    justify-content: center;
    align-items: center;
    min-height: 100vh;
    background: #5372f0;
}
::selection
{
    color: #fff;
    background: #5372f0;
}
.wrapper
{
    width: 495px;
    background: #fff;
    border-radius: 10px;
    padding: 18px 25px 20px;
    box-shadow: 0 0 30px rgba(0,0,0,0.06);
}
.wrapper :where(.title, li, .details)
{
    display: flex;
    align-items: center;
}
.wrapper .title img
{
    max-width: 21px;
}
.wrapper .title h2
{
    margin-left: 8px;
    font-size: 21px;
    font-weight: 600;
}
.wrapper .url-field
{
    width: 100%;
}
.wrapper .url-field .title
{
    font-size: 18px;
    color: #444;
    width: 100%;
}
.wrapper .url-field .field
{
    margin-top: 10px;
    margin-bottom: 10px;
    height: 50px;
    width: 100%;
    position: relative;
}
.field input
{
    width: 100%;
    height: 100%;
    padding: 0 15px;
    background: #f1f1f7;
    border: none;
    outline: none;
    font-size: 15px;
    border-bottom: 2px solid #ccc;
}
.field input::placeholder
{
    color: #b3b3b3;
}
.field .bottom-line
{
    position: absolute;
    width: 100%;
    height: 2px;
    bottom: 0;
    left: 0%;
    background: #4343ff;
    transform: scale(0);
    transition: 0.3s ease-in-out;
}
.field input:focus ~ .bottom-line,
.field input:valid ~ .bottom-line
{
    transform: scale(1);
}

.wrapper .content
{
    margin: 10px 0px;
}
.content p
{
    font-size: 15px;
}
.content ul
{
    display: flex;
    flex-wrap: wrap;
    min-height: 50px;
    max-height: 300px;
    border: 1px solid #a6a6a6;
    border-radius: 5px;
    padding: 7px;
    margin: 12px 0;
    overflow-y: auto;
}
.content ul li
{
    color: #333;
    margin: 4px 3px;
    background: #f2f2f2;
    border: 1px solid #e3e1e1;
    border-radius: 30px;
    padding: 5px 10px 5px 12px;
    list-style: none;
}
.content .details
{
    justify-content: space-between;
}
.content .details p
{
    font-size: 15px;
}
.content .details button
{
    outline: none;
    border: none;
    color: #fff;
    cursor: pointer;
    background: #5372f0;
    padding: 9px 15px;
    border-radius: 5px;
    font-size: 14px;
    transition: 0.3s ease-in-out;
}
.content .details button:hover
{
    background: #2c52ed;
}
last, create a JavaScript file with the name of script.js and paste the given codes in your JavaScript file. Remember, you’ve to create a file with .js extension.
const urlField = document.querySelector('.field input');
const ul = document.querySelector('.url-field ul');
const tagNum = document.querySelector('.details span');


urlField.onkeyup = ()=>{
    let vidId = urlField.value;
    if (vidId.indexOf('https://www.youtube.com/watch?v=') != -1) {
        let Id = vidId.split('v=')[1].substring(0, 11);
        // console.log(Id);
        getTags(Id);
    }else if (vidId.indexOf('https://youtu.be/') != -1) {
        let Id = vidId.split('be/')[1].substring(0, 11);
        // console.log(Id);
        getTags(Id);
    }

}

function getTags(Id) {
    // Please Use your on api key
    let key = "AIzaSyD3NXPLGOHw_MIBiEL6-Xc0LYTSsb_thQo";
    // let key = ["Your Api key"];
    fetch(`https://www.googleapis.com/youtube/v3/videos?id=${Id}&key=${key}&part=snippet`)
    .then((res)=> res.json())
    .then((data)=>{
        // console.log(data);
        let tags = data.items[0].snippet.tags;
        if (tags === undefined) {
            ul.innerHTML = `No tags are found`;
            tagNum.innerHTML = '0';
        }else{
            let hidden = document.querySelector('.wrapper .hidden');
            hidden.value = tags.toString();
            createTags();
            countTags()

        }

        function countTags() {
            tagNum.innerHTML = tags.length;
        }

        function createTags() {
            ul.querySelectorAll('li').forEach(li => li.remove())
            tags.slice().reverse().forEach(tag =>{
                let liTags = `${tag}`;
                ul.insertAdjacentHTML('afterbegin', liTags)
            })

        }

    }).catch((error) => {
        console.log(error);
    })
}

const copyBtn = document.querySelector('.details button');
copyBtn.addEventListener('click',()=>{
    let hidden = document.querySelector('.wrapper .hidden');
    hidden.select();
    hidden.setSelectionRange(0, 999999);
    navigator.clipboard.writeText(hidden.value);
    alert('Tags are copied')
})
That’s all, now you’ve successfully created a program to create YouTube video tags Finder using HTML, CSS & JavaScript. If your code doesn’t work or you’ve faced any error/problem, please download the source code files from the given download button. It’s free and a .zip file will be downloaded then you’ve to extract it.
Click on the following download button to download all source code files.