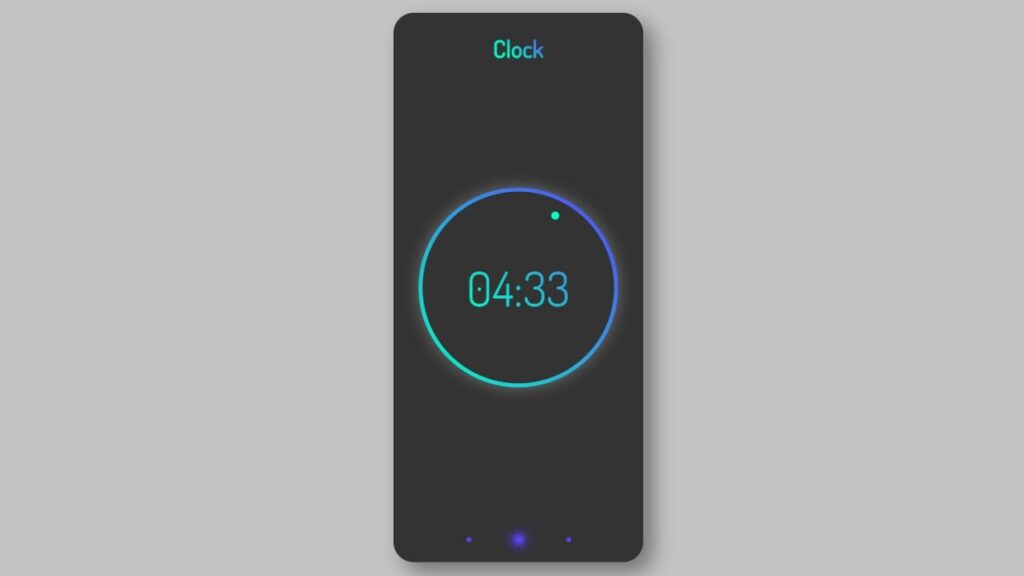
Digital clocks have been a staple in our daily lives for decades, serving as a reliable source for checking the time and keeping us on track with our schedules. With the rise of technology and the increasing prevalence of digital devices, it’s no surprise that the design of digital clocks has also evolved over the years.
One way to add a creative twist to a digital clock is through its user interface (UI) design. A well-designed UI can not only make the clock more visually appealing, but also more user-friendly and intuitive to use.
There are a variety of design elements that can be incorporated into a digital clock UI. For example, the clock’s layout can be customized to display the time in a unique way, such as using different font sizes or colors for the hours, minutes, and seconds. The background and overall color scheme of the clock can also be modified to match the aesthetic of the device or room it is displayed in.
In addition to visual elements, a digital clock UI can also include functional features to enhance the user experience. This can include the ability to set alarms, display the date and/or weather, and even provide inspiration or motivational quotes.
To implement a creative digital clock UI design, a combination of HTML, CSS, and JavaScript can be used. HTML is used to structure the content and layout of the clock, CSS is used to style and customize the appearance of the clock, and JavaScript is used to add interactivity and functionality to the clock.
In conclusion, a well-designed digital clock UI can add a touch of creativity and personality to a commonly used device. By utilizing HTML, CSS, and JavaScript, designers can customize the layout, appearance, and functionality of the clock to create a unique and user-friendly experience for users.
Video Tutorial of Creative Digital Clock Ui Design – Html Css & Vanilla JavaScript
To create a Creative Digital Clock UI, you will need to create three separate files: one for HTML, one for CSS, and one for JavaScript. Start by creating an HTML file called “index.html” and paste the provided code into it. Make sure to save the file with the .html extension.
Once you have your HTML file set up, you can move on to styling the clock using CSS and adding functionality with JavaScript. With the combination of these three technologies, you will be able to create a beautiful and functional digital clock.
In the first place, make a HTML document with the name of index.html and glue the given codes in your HTML record. Keep in mind, you’ve to make a document with .html extension.
<!DOCTYPE html>
<html lang="en">
<head>
   <meta charset="UTF-8">
   <meta http-equiv="X-UA-Compatible" content="IE=edge">
   <meta name="viewport" content="width=device-width, initial-scale=1.0">
   <link rel="stylesheet" href="style.css">
   <title>Creative Digital Clock UI Design - Html CSS & Vanilla Javascript</title>

   <!-- Created by S-Tech04 -->

</head>
<body>
   <div class="container">
      <h2 class="title">Clock</h2>
      <div class="box">
         <span></span>
         <div class="clock">
            <h3 id="hour">04</h3>
            <h3 id="dot">:</h3>
            <h3 id="mint">33</h3>
         </div>
      </div>
      <div class="dots">
         <span></span>
         <span></span>
         <span></span>
      </div>
   </div>


   <script>

      function clock(){
         let hour = document.getElementById('hour');
         let min = document.getElementById('mint');

         h = new Date().getHours();
         m = new Date().getMinutes();

         // now i'll convert 24hour time to 12 hour

         if(h > 12){
            h = h - 12;
         }

         // Add 0 to  the begining of number if less then 10

         h = (h < 10) ? "0" + h : h;
         m = (m < 10) ? "0" + m: m;

         hour.innerHTML = h;
         min.innerHTML = m;
      }

      var Interval = setInterval(clock,0)
   </script>
</body>
</html>
Second, make a CSS record with the name of style.css and glue the given codes in your CSS document. Keep in mind, you’ve to make a record with .css extension.
@import url('https://fonts.googleapis.com/css2?family=Dosis:wght@200;300;400;500&display=swap');
*
{
   margin: 0;
   padding: 0;
   box-sizing: border-box;
   font-family: 'Dosis', sans-serif;
}

body
{
   display: flex;
   justify-content: center;
   align-items: center;
   height: 100vh;
   background: #c3c3c3;
}
.container
{
   width: 250px;
   height: 550px;
   background: #333;
   box-shadow: 10px 10px 20px rgba(0,0,0,0.4);
   border-radius: 20px;
   display: flex;
   justify-content: center;
   align-items: center;
   position: relative;
}
.container .title
{
   position: absolute;
   top: 20px;
   color: transparent;
   background: linear-gradient(45deg,#00ffc1 30%,#5a41fa);
   background-clip: text;
   -webkit-background-clip: text;
}
.container .box
{
   background: #333;
   width: 200px;
   height: 200px;
   box-shadow: 0 0 15px rgba(255,255,255,0.3);
   border-radius: 50%;
   position: relative;
}
.container .box::before
{
   content: '';
   position: absolute;
   top: 0;
   left: 0;
   width: 100%;
   height: 100%;
   background: linear-gradient(45deg,#00ffc1,#5a41fa);
   border-radius: 50%;
}
.container .box span
{
   position: absolute;
   top: 4px;
   left: 4px;
   bottom: 4px;
   right: 4px;
   background: #333;
   border-radius: 50%;
   z-index: 99;
}
.container .box span::before
{
   content: '';
   position: absolute;
   top: 20px;
   right: 55px;
   width: 8px;
   height: 8px;
   background: #00ffc1;
   border-radius: 50%;
}
.container .box .clock
{
   position: absolute;
   top: 0;
   left: 0;
   width: 100%;
   height: 100%;
   display: flex;
   justify-content: center;
   align-items: center;
   background: linear-gradient(45deg,#00ffc1 30%,#5a41fa);
   background-clip: text;
   -webkit-background-clip: text;
   z-index: 100;
}
.container .box .clock h3
{
   color: transparent;
   font-size: 3em;
   font-weight: 400;
}
.container .dots
{
   position: absolute;
   bottom: 20px;
   width: 150px;
   display: flex;
   justify-content: space-around;
   align-items: center;
}
.container .dots span
{
   width: 5px;
   height: 5px;
   background: #5a41fa;
   border-radius: 50%;
}
.container .dots span:nth-child(2)
{
   box-shadow: 0 0 1px #5a41fa,
               0 0 2px #5a41fa,
               0 0 3px #5a41fa,
               0 0 4px #5a41fa,
               0 0 5px #5a41fa,
               0 0 6px #5a41fa,
               0 0 7px #5a41fa,
               0 0 8px #5a41fa,
               0 0 9px #5a41fa,
               0 0 10px #5a41fa,
               0 0 11px #5a41fa,
               0 0 12px #5a41fa,
               0 0 13px #5a41fa,
               0 0 14px #5a41fa,
               0 0 15px #5a41fa,
               0 0 16px #5a41fa,
               0 0 17px #5a41fa;
}

/* colors
   #c3c3c3
   #00ffc1
   #5a41fa
*/
In conclusion, creating a creative digital clock UI design using HTML, CSS, and vanilla JavaScript is a fun and easy project that can help you improve your web development skills. By following the steps outlined in this tutorial, you will be able to create a unique and visually appealing digital clock that can be customized to fit your personal style. Whether you are a beginner or an experienced developer, this project is a great way to challenge yourself and showcase your creativity. With a little bit of patience and practice, you will be able to create a digital clock UI design that you can be proud of.
Click on the following download button to download all source code files.